A Hassle with Big Payoffs
Hang your troubleshooting hat on fixing plumbing leaks

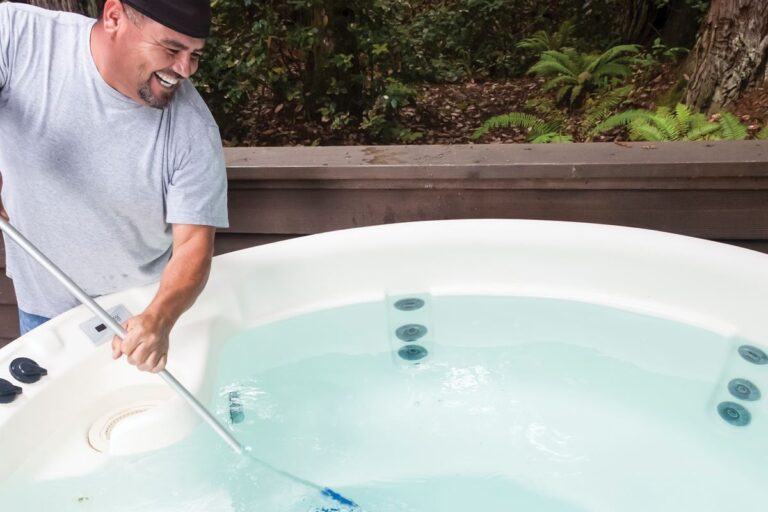
The phrase ‘into the belly of the beast’ pertains to just about any spa with an internal plumbing leak. Someone has to go inside and navigate the mass of plumbing through layers of cabinet, insulation and spider webs to find the bleeding artery. It’s potentially one of the biggest negatives of our job. The goal is to look at the positive aspects of it.
Lying in a pool of water with your arm shoulder-deep in wet foam, rat poop and large spiders is not a pleasant environment, but neither is trying to change diesel injectors in a Detroit Diesel engine that hasn’t been cleaned in years. Like master mechanics of big rigs, we get paid (hopefully well) to do it.
In this age of internet spa parts and YouTube, we constantly battle for our share of the pie, and internal plumbing repairs are among the top service calls for job security. Just about any DIYer can change a motor or order a heater assembly and YouTube how to put it in, but most of them don’t want to tackle finding a leak further than the first layer of cabinet. Those who do shudder when they see water spraying out of a manifold assembly that looks like a can of fishing worms.
Tackling the tough leaks is more about mind-set and tools than anything else. Those big jobs keep you in one place, with one customer, making more money than you potentially could running all over town, using gas, wasting time and looking for addresses. The more you get paid to work one job, the fewer jobs you need!
You go out for a simple leak and the customer says, “I can’t see anything obvious but there’s always water around it, and I’m adding six inches of water a day!” That’s a good-size leak, and if it’s been going for awhile, you will often see obvious signs of wear. However, in a fully foamed spa, that might mean little to nothing.
The first thing I do is to take off whatever panels I can. Set up your arsenal of tools and equipment like a pro. Not all spas have removable side panels, however, and trying to pry your way into a spa cabinet with pocket knife and a Phillips screw driver makes you look incompetent, and leaves the spa looking like it was attacked by an angry beaver.
I look for soaked foam or signs of water, shining a light around the inside of the equipment area and turning on both pumps, looking for water movement or an increase in the leak. If there is wet foam, I push my hand into it and see if the water is warm. If it is, I’m probably close. If not, I dig — first up and then inward, staying with the most soaked part.
If I can’t get the panels off easily, or the leak is under the spa where it needs to be lifted, I form a plan and discuss it with the customer. I tire of hearing techs say, “I couldn’t get to it!” or “I couldn’t move the spa by myself to find the leak.” There’s always a way. When it needs to be lifted I may not be able to get into it right then and there, but I figure out the best way before leaving and set up another time. Before going back out, I make sure I have everything I need to move forward.
I typically charge between $400 and $1,500 to lift a spa and fix major leaks, depending on how long I’m there. This is usually an easy pill for a customer to swallow; all too often, my competition has told them the spa needs to be brought into the shop at $1,000 to $1,500 to even search for the leak, and then they can’t guarantee it. Because of what I charge, I’ve been able to afford the tools needed. I have a SpaWedge from Spa Dolly and a good vacuum (to inflate the wedge), which cost around $500 total. I can pry most spas up a bit, slide the SpaWedge under and lift it enough to block it by myself. If the spa is too close to a wall or other obstruction, I pry it up a bit, put PVC under it and then roll it out. I also bought some lightweight adjustable automobile jack stands, which I use because they are much lighter and easier to move than cinderblocks.
If the spa is sunk into a deck, I crawl under it and pry the spa up enough to get 4-by-4s under it, slide the SpaWedge under the spa and blow up the wedge while sliding boards under. Once it’s braced with boards, I use the jack stands in the hole to hold it up.
The hardest part is controlling the lift. Often I use a scissor jack or bumper jack because when I’m using the wedge by myself it’s a bit hard to control the “float” — so I jack one side up and then the other. If the spa is tipped on end, I will usually do that first and pull any base completely off. All of this is usually about an hour by myself, so I plan my time and quote accordingly. I try to have another tech or helper during the lift and set down process.
Once the spa is blocked up — with a support on each corner and one in the middle — I throw a hose in even before I start digging through the foam so it can be filling while I dig. I always keep trash bags in the truck and try to take the initial insulation out in large chunks, putting them in trash bags to reuse later.
A very handy tool is my DeWalt 20-volt oscillating multitool. It can cut through just about anything, but use care not to nick plumbing lines. I use a cat’s paw nail puller to scrape closer around the plumbing. Goggles are a must. As I dig, I look first for wet areas, then for darker areas of foam, which are usually closer to the heart of the leak. Once I spot the leak and I see no other obvious wet spots, I drain the spa and start scraping to bare PVC. When you’re getting to some of the deeper plumbing, your heat gun can be very useful to move other lines out of the way. If there are frame pieces or large pipes in the way, I usually just cut them out and repair them later. It’s easier working around them.
In this day of smartphones, you can’t take enough pictures during a repair. Taking photos and reviewing them can give you a lot of insight. If you had to cut and move plumbing, it keeps a record of where things go.
I can usually diagnose, pull, block, dig and repair a 4- to 12-port manifold in half a day. I try to leave the electrical connected so the spa can be filled and fired on blocks to test for a day. When I go back, I drain the spa, tip it up, shove the large foam pieces in, fill around them with Great Stuff foam and fix any base or frame issues. I carry an 18-volt battery-powered stapler and battery-powered nailer to put things back together simply and professionally. I also have liquid nails and epoxy in the truck if I need to fix cabinet pieces. When I leave, the spa looks better than when I got there.
This all may sound like a lot, but often it’s the difference between a customer paying you to do a job or losing a customer because they give up on owning a spa. Most people prefer to spend $1,500 to repair a spa than buy a new one. When they spend that amount, it’s usually pretty easy to talk them into extras like a new cover or a lifter.
If I spend a full day in two trips on one customer and make $800 to $1,500 using $20 in plumbing and $10 in glue, it beats the heck out of driving all over town to make $500 to $1,000 with the cost of gas, wear and tear and only making $100 of that in labor.
The internet doesn’t block spas, dig foam, route plumbing or fix leaks. That’s something to hang your hat on.

Robert Stuart has been in the spa industry for more than 20 years as a technician, store manager, factory representative, salesman and business owner.